https://www.cnblogs.com/yangfengwu/p/9968883.html
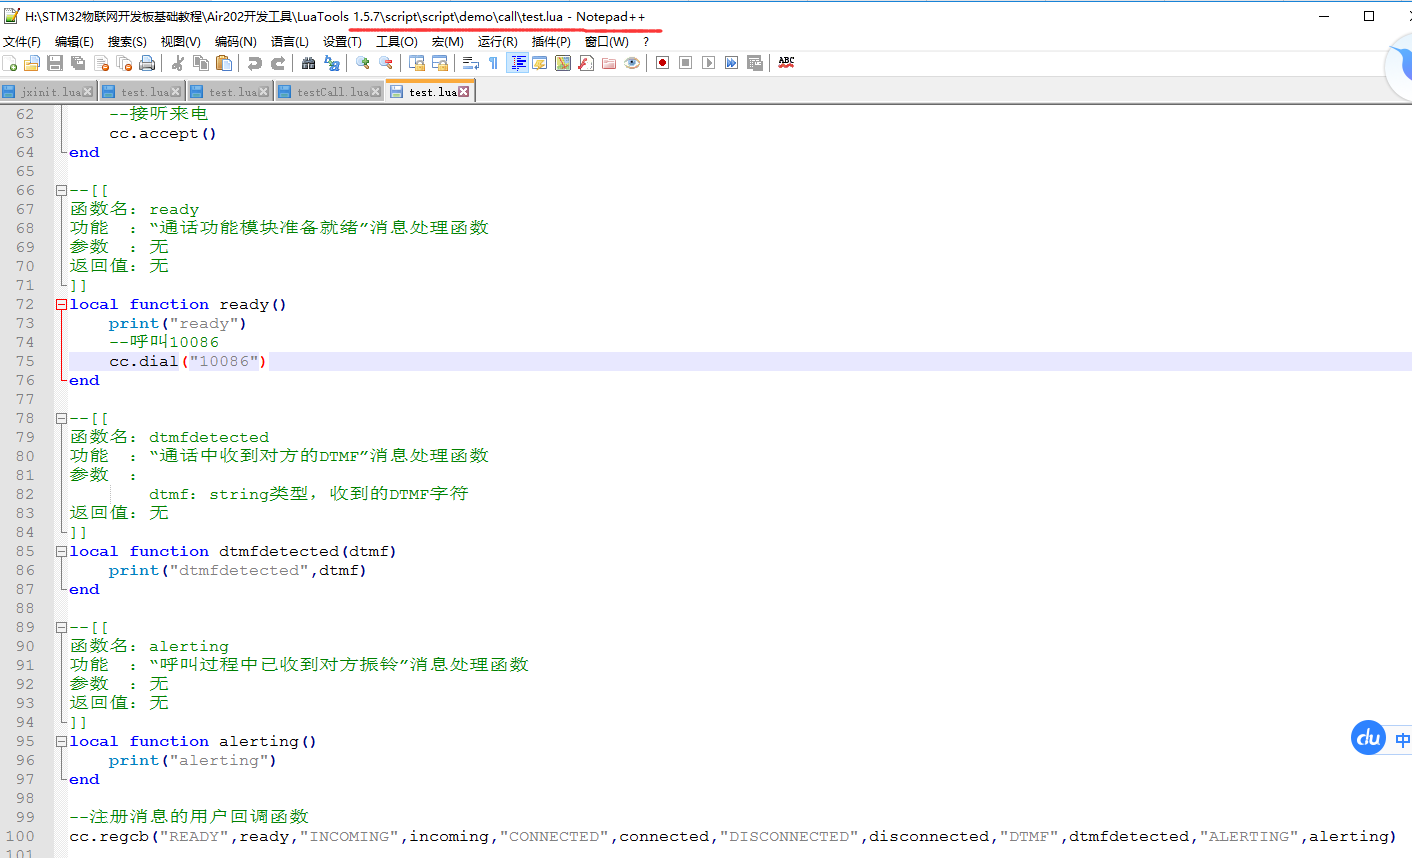
这个直接用官方给的demo就可以
现在说个需求哈,是当初一个人给提出的需求

例如存入的号码 姓名 号码 1 10086 2 10010 ... ....例如存入的号码
01 0501 05代表所有的号码循环拨打5次 01代表延时1小时后重复GPIO4控制打电话(低电平有效)
开机以后先读取手机卡里面的信息,筛选出来姓名1
-99 和对应的号码取出01对应的次数
5 时间间隔 1小时读取完成以后如果GPIO4为低电平,先拨打姓名1对应的号码,如果后面还有2 间隔50S就会再拨打2对应的号码,如果还有3,
4,5….依次排着拨打
顺序拨打完一遍 次数加1 顺序拨打5次 延时1小时 然后 循环
直接源码
module(...,package.seeall)
require"cc"
require"pb"
require"sys"
require"net"
require"pins"
require"common"–[[
GPIO4低电平拨打电话
GPIO5,GPIO6,GPIO7信号强度指示
]]local function print(…)
_G.print(“testCall“,…)
endlocal ReadTelephoneTable={};
local ReadTelephoneTableCopy={};
local ReadTelephoneCnt=1;
local ReadErr=0;
local LoopCnt=0;
local DelayHour=0;
local CallReadyFlage=0;
local j=1;
local CallMax = 0;
local CallCnt = 0;
local DelayCallValue = 50000;
local InputState = 0;
local ReadTelephoneSuccess = 0;–是否读取号码完成InputKey = pio.P0_4;–输入按钮
Led1 = pio.P0_5;–Led1
Led2 = pio.P0_6;–Led2
Led3 = pio.P0_7;–Led3
pio.pin.setdir(pio.OUTPUT,InputKey)
pio.pin.setval(1,InputKey)pio.pin.setdir(pio.OUTPUT,Led1)
pio.pin.setval(1,Led1)pio.pin.setdir(pio.OUTPUT,Led2)
pio.pin.setval(1,Led2)pio.pin.setdir(pio.OUTPUT,Led3)
pio.pin.setval(1,Led3)function ReadTelephone()
pb.read(ReadTelephoneCnt, readcb)
end–[[小于70小时,大于35小时使用]]
function Delay35Hour()
sys.timerStart(CallTelephoneLoop,(DelayHour-35) * 60 * 60 * 1000)
end
–[[小于100小时,大于70小时使用]]
function Delay35HourA()
sys.timerStart(CallTelephoneLoop,(DelayHour-70) * 60 * 60 * 1000)
end
–[[小于100小时,大于70小时使用]]
function Delay35HourB()
sys.timerStart(Delay35HourA,35 * 60 * 60 * 1000)
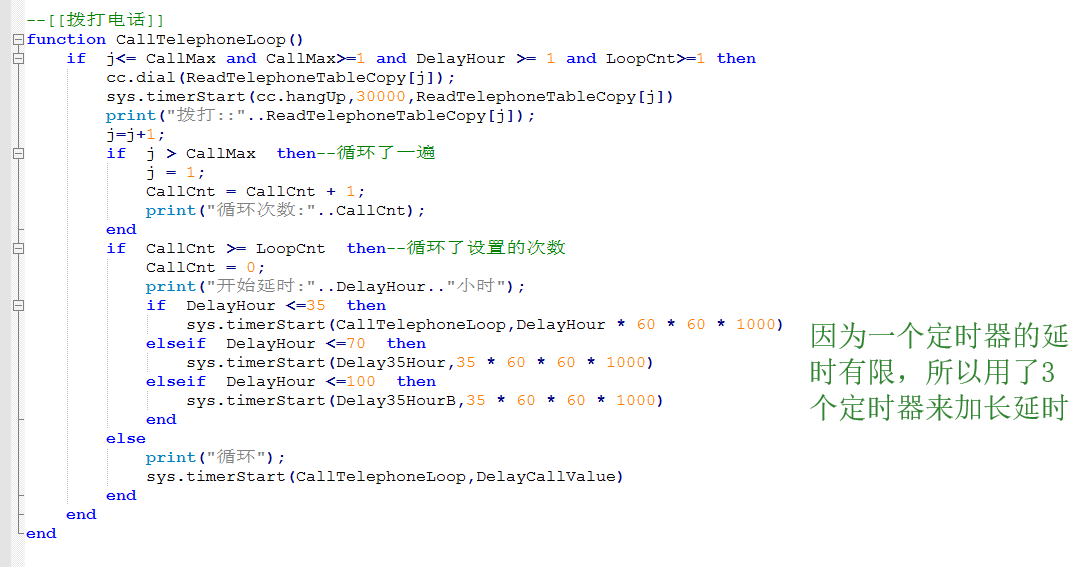
end–[[拨打电话]]
function CallTelephoneLoop()
if j<= CallMax and CallMax>=1 and DelayHour >= 1 and LoopCnt>=1 then
cc.dial(ReadTelephoneTableCopy[j]);
sys.timerStart(cc.hangUp,30000,ReadTelephoneTableCopy[j])
print(“拨打::“..ReadTelephoneTableCopy[j]);
j=j+1;
if j > CallMax then–循环了一遍
j = 1;
CallCnt = CallCnt + 1;
print(“循环次数:“..CallCnt);
end
if CallCnt >= LoopCnt then–循环了设置的次数
CallCnt = 0;
print(“开始延时:“..DelayHour..“小时“);
if DelayHour <=35 then
sys.timerStart(CallTelephoneLoop,DelayHour * 60 * 60 * 1000)
elseif DelayHour <=70 then
sys.timerStart(Delay35Hour,35 * 60 * 60 * 1000)
elseif DelayHour <=100 then
sys.timerStart(Delay35HourB,35 * 60 * 60 * 1000)
end
else
print(“循环“);
sys.timerStart(CallTelephoneLoop,DelayCallValue)
end
end
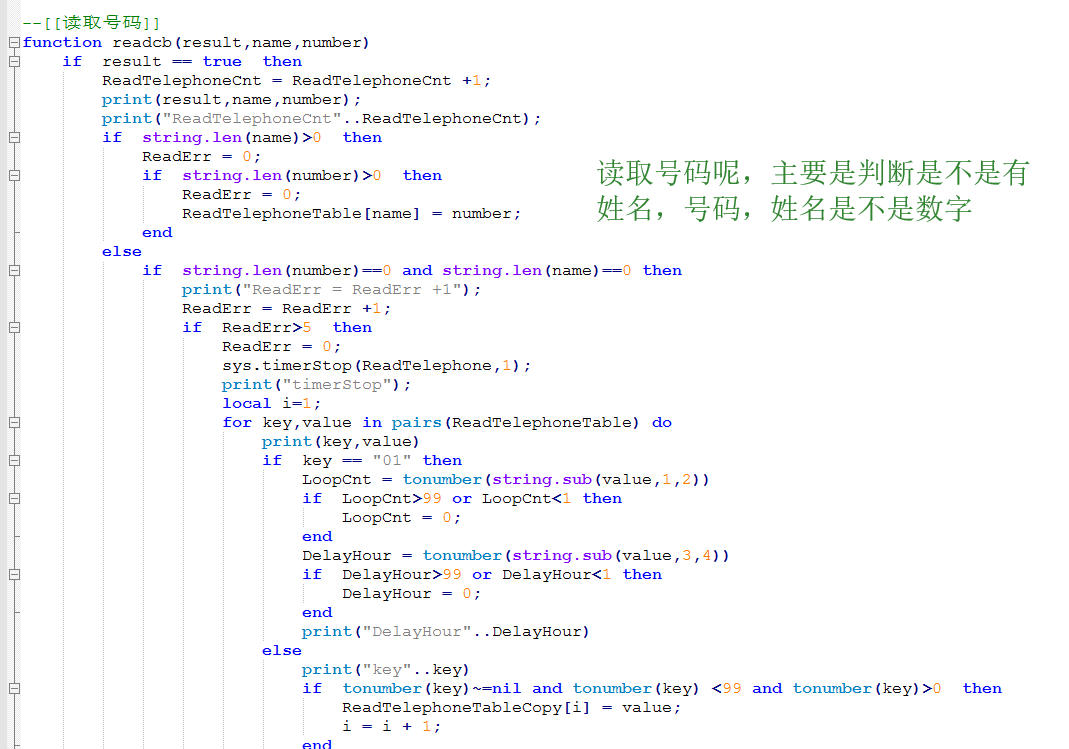
end–[[读取号码]]
function readcb(result,name,number)
if result == true then
ReadTelephoneCnt = ReadTelephoneCnt +1;
print(result,name,number);
print(“ReadTelephoneCnt“..ReadTelephoneCnt);
if string.len(name)>0 then
ReadErr = 0;
if string.len(number)>0 then
ReadErr = 0;
ReadTelephoneTable[name] = number;
end
else
if string.len(number)==0 and string.len(name)==0 then
print(“ReadErr = ReadErr +1“);
ReadErr = ReadErr +1;
if ReadErr>5 then
ReadErr = 0;
sys.timerStop(ReadTelephone,1);
print(“timerStop“);
local i=1;
for key,value in pairs(ReadTelephoneTable) do
print(key,value)
if key == “01“ then
LoopCnt = tonumber(string.sub(value,1,2))
if LoopCnt>99 or LoopCnt<1 then
LoopCnt = 0;
end
DelayHour = tonumber(string.sub(value,3,4))
if DelayHour>99 or DelayHour<1 then
DelayHour = 0;
end
print(“DelayHour“..DelayHour)
else
print(“key“..key)
if tonumber(key)~=nil and tonumber(key) <99 and tonumber(key)>0 then
ReadTelephoneTableCopy[i] = value;
i = i + 1;
end
end
end
CallMax = i - 1;
ReadTelephoneSuccess = 1;
end
end
end
if string.len(number)>0 then
ReadErr = 0;
print(“string.len(number)>0 ReadErr = 0“);
end
else
print(result,name,number);
end
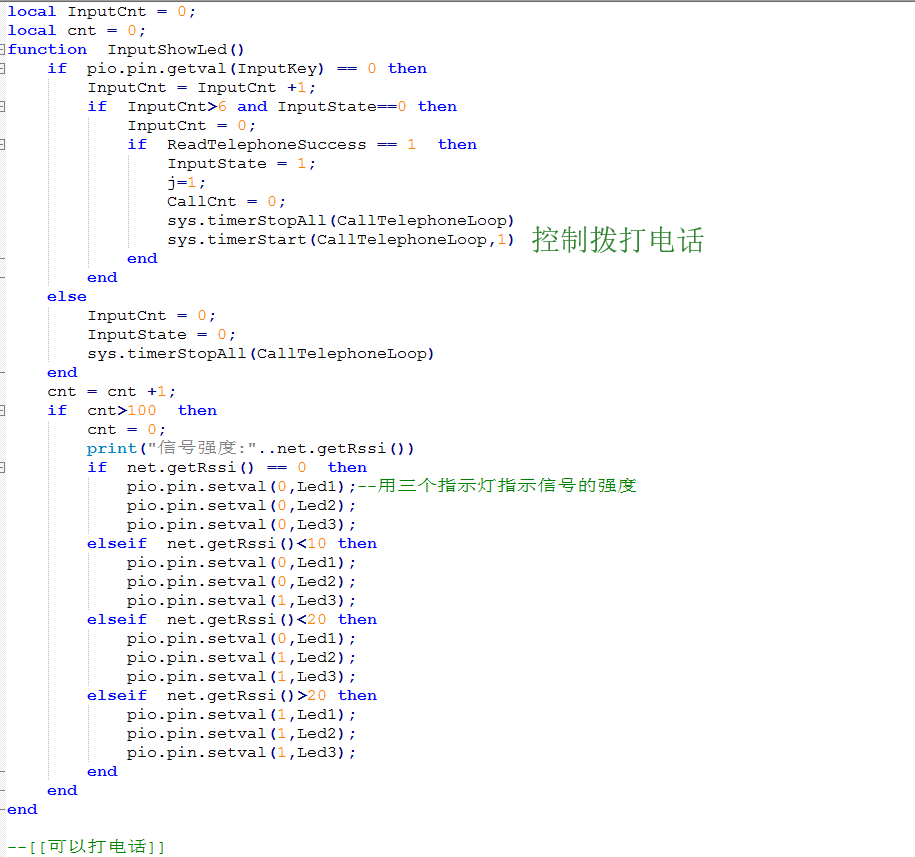
endlocal InputCnt = 0;
local cnt = 0;
function InputShowLed()
if pio.pin.getval(InputKey) == 0 then
InputCnt = InputCnt +1;
if InputCnt>6 and InputState==0 then
InputCnt = 0;
if ReadTelephoneSuccess == 1 then
InputState = 1;
j=1;
CallCnt = 0;
sys.timerStopAll(CallTelephoneLoop)
sys.timerStart(CallTelephoneLoop,1)
end
end
else
InputCnt = 0;
InputState = 0;
sys.timerStopAll(CallTelephoneLoop)
end
cnt = cnt +1;
if cnt>100 then
cnt = 0;
print(“信号强度:“..net.getRssi())
if net.getRssi() == 0 then
pio.pin.setval(0,Led1);–用三个指示灯指示信号的强度
pio.pin.setval(0,Led2);
pio.pin.setval(0,Led3);
elseif net.getRssi()<10 then
pio.pin.setval(0,Led1);
pio.pin.setval(0,Led2);
pio.pin.setval(1,Led3);
elseif net.getRssi()<20 then
pio.pin.setval(0,Led1);
pio.pin.setval(1,Led2);
pio.pin.setval(1,Led3);
elseif net.getRssi()>20 then
pio.pin.setval(1,Led1);
pio.pin.setval(1,Led2);
pio.pin.setval(1,Led3);
end
end
end–[[可以打电话]]
local function CallReadyMethod()
CallReadyFlage = 1;
print(“CALL_READY“);
end
—对方接听
– string num,建立通话的对方号码
local function connected(num)
print(“主动结束通话“)
cc.hangUp(num)
end–结束通话
local function disconnected(para)
print(“disconnected:“..(para or “nil“))
endsys.timerLoopStart(ReadTelephone,1000,1)
sys.subscribe(“CALL_CONNECTED“,connected)
sys.subscribe(“CALL_READY“,CallReadyMethod)
sys.subscribe(“CALL_DISCONNECTED“,disconnected)
sys.timerLoopStart(InputShowLed,10)
cc.dtmfDetect(true)
其实逻辑处理也挺复杂的
源码打包出售 https://item.taobao.com/item.htm?spm=a2126o.11854294.0.0.3e3a4831ODxjIk&id=582359919556
剩余的大家自己去研究哈,也可以按照规定的存储手机卡号码,看看拨打情况
资料源码链接
链接:https://pan.baidu.com/s/1-SRfsKGQ7rZVvFmp1ObHWw 密码:p9qs
基础教程源码链接如果失效,请在淘宝介绍中下载,由于链接还是失效,请联系卖家,谢谢
https://item.taobao.com/item.htm?spm=a1z10.1-c-s.w4004-18540610442.6.36a74814ZSaRsu&id=569295486025